The Scepter
Electric Fence

Watch How to
Install the Scepter
Electric Fence System
↓
Equipment Needed

Scepter Electric Posts, Scepter E-Clips and Pins, Scepter Polywire, Scepter Fence Charger, Grounding Kit, Scepter Stabilizer Spike (Optional)
Person Protection Equipment

Rubber Insulated Gloves, Rubber Soled Insulated Boots, Safety Glasses, Electric Fence Tester.
Electrical Diagram
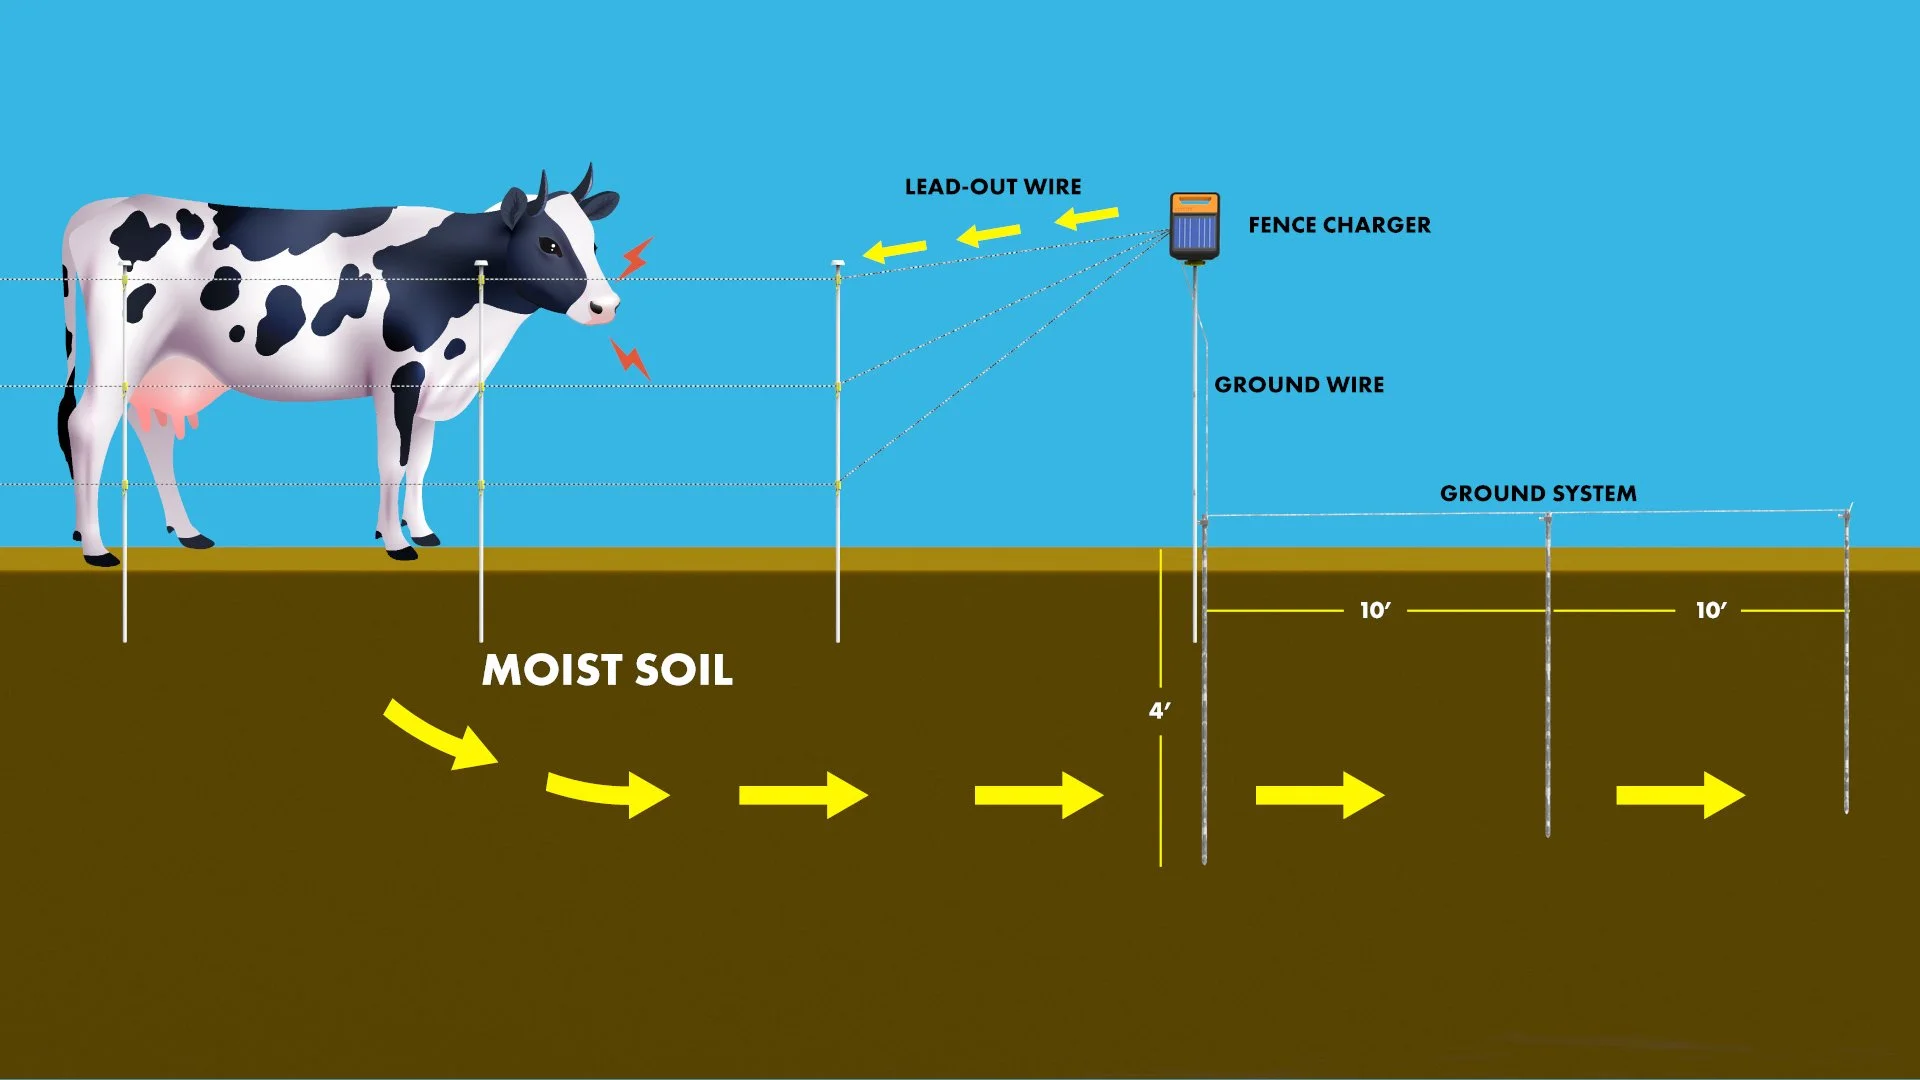
Follow this diagram to ensure that your Scepter Electrical Fence has been properly Set-up
Fence Installation
Step 1

Begin by laying out the Scepter Electric posts along the desired fence line approximately 8-10 feet apart.
Step 2

Using a Club hammer or Scepter Driving Tool, begin installing the Electric posts along the fence line.
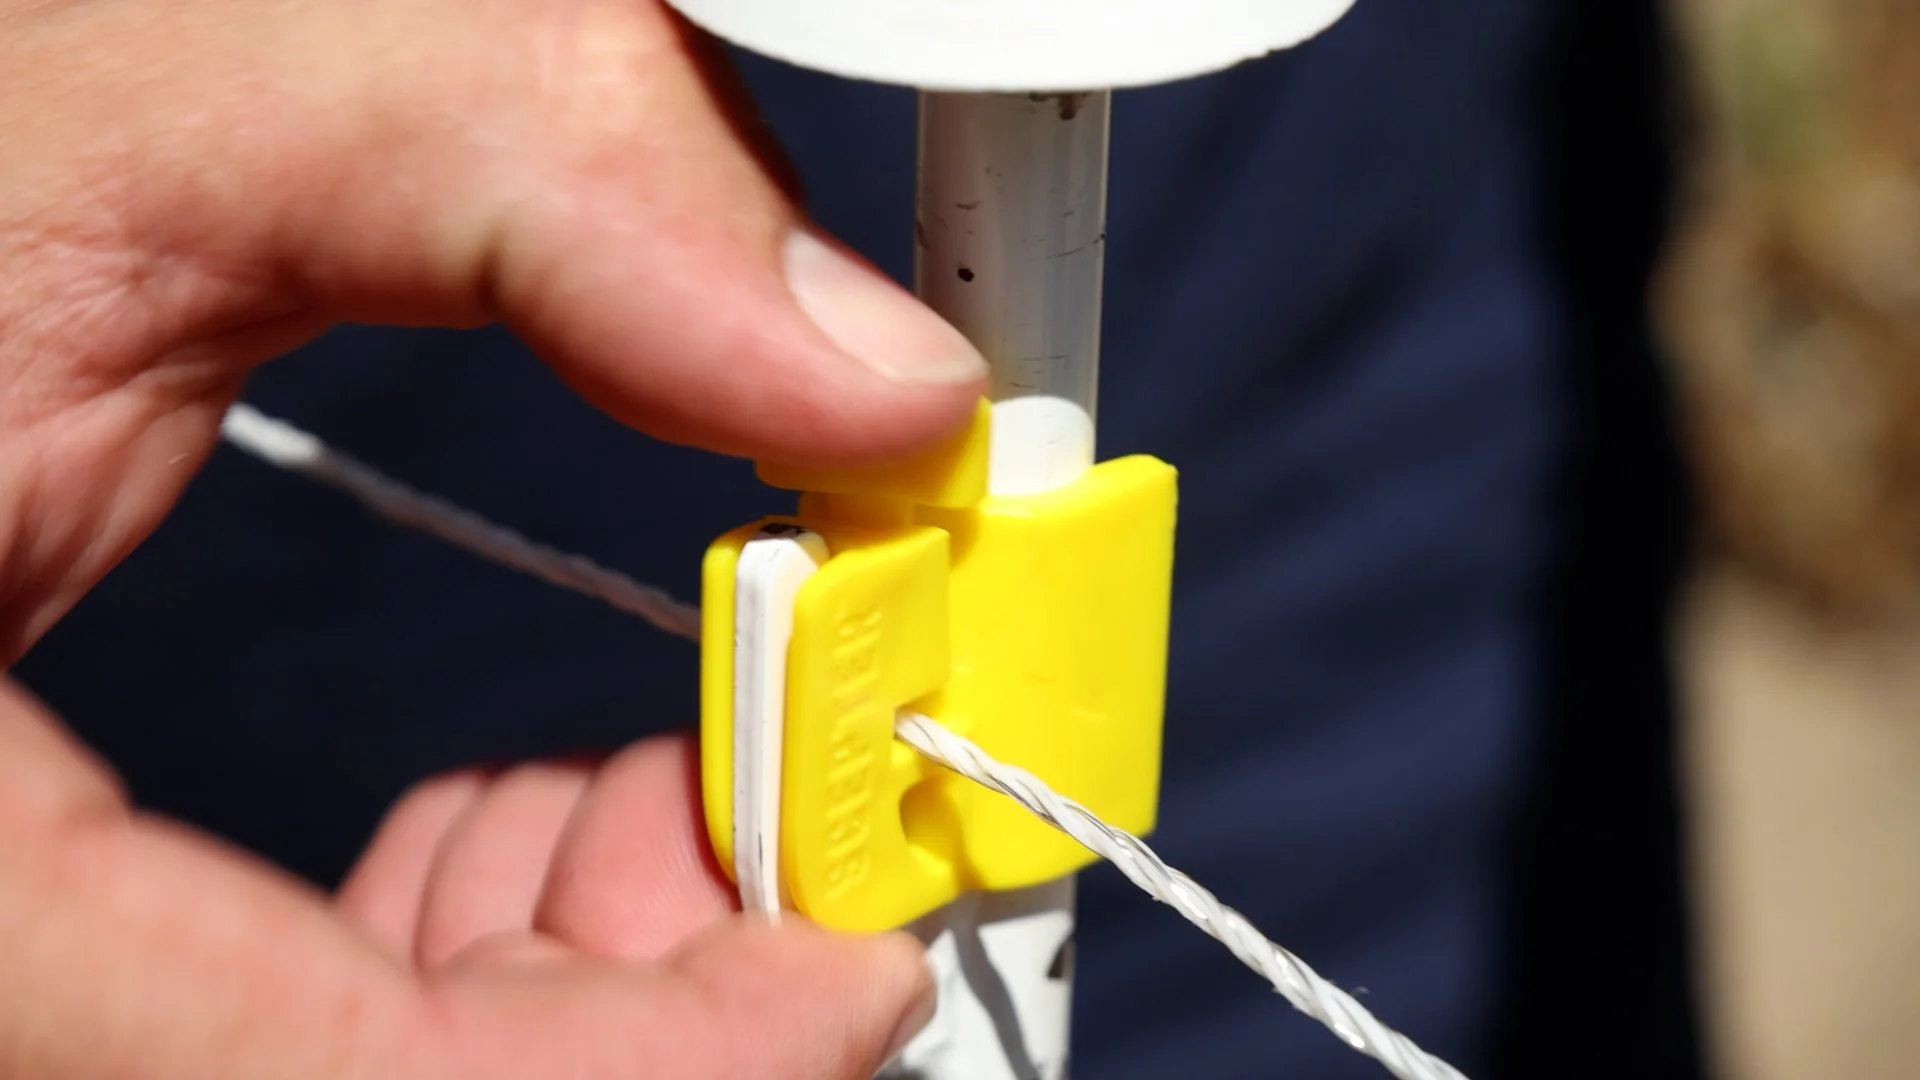
Step 3

Attach each E-Clip to the appropriate hooks with the barbed spike facing down and the clasp toward the post. attach the clasp first then slide the E-clip down till the barbed spike clicks into place.
Step 4
Run your polywire along the rows of E-clips, inserting it into the slot on the top of the E-clip, and pulling it down into place.
Step 5
Every 4-5 posts, take a pin and insert it with the wings parallel to the opening on the top of the E-clip and rotate clockwise into place until it snaps. Do this on every wired line of the post.
Grounding Kit & Charger
Step 1a

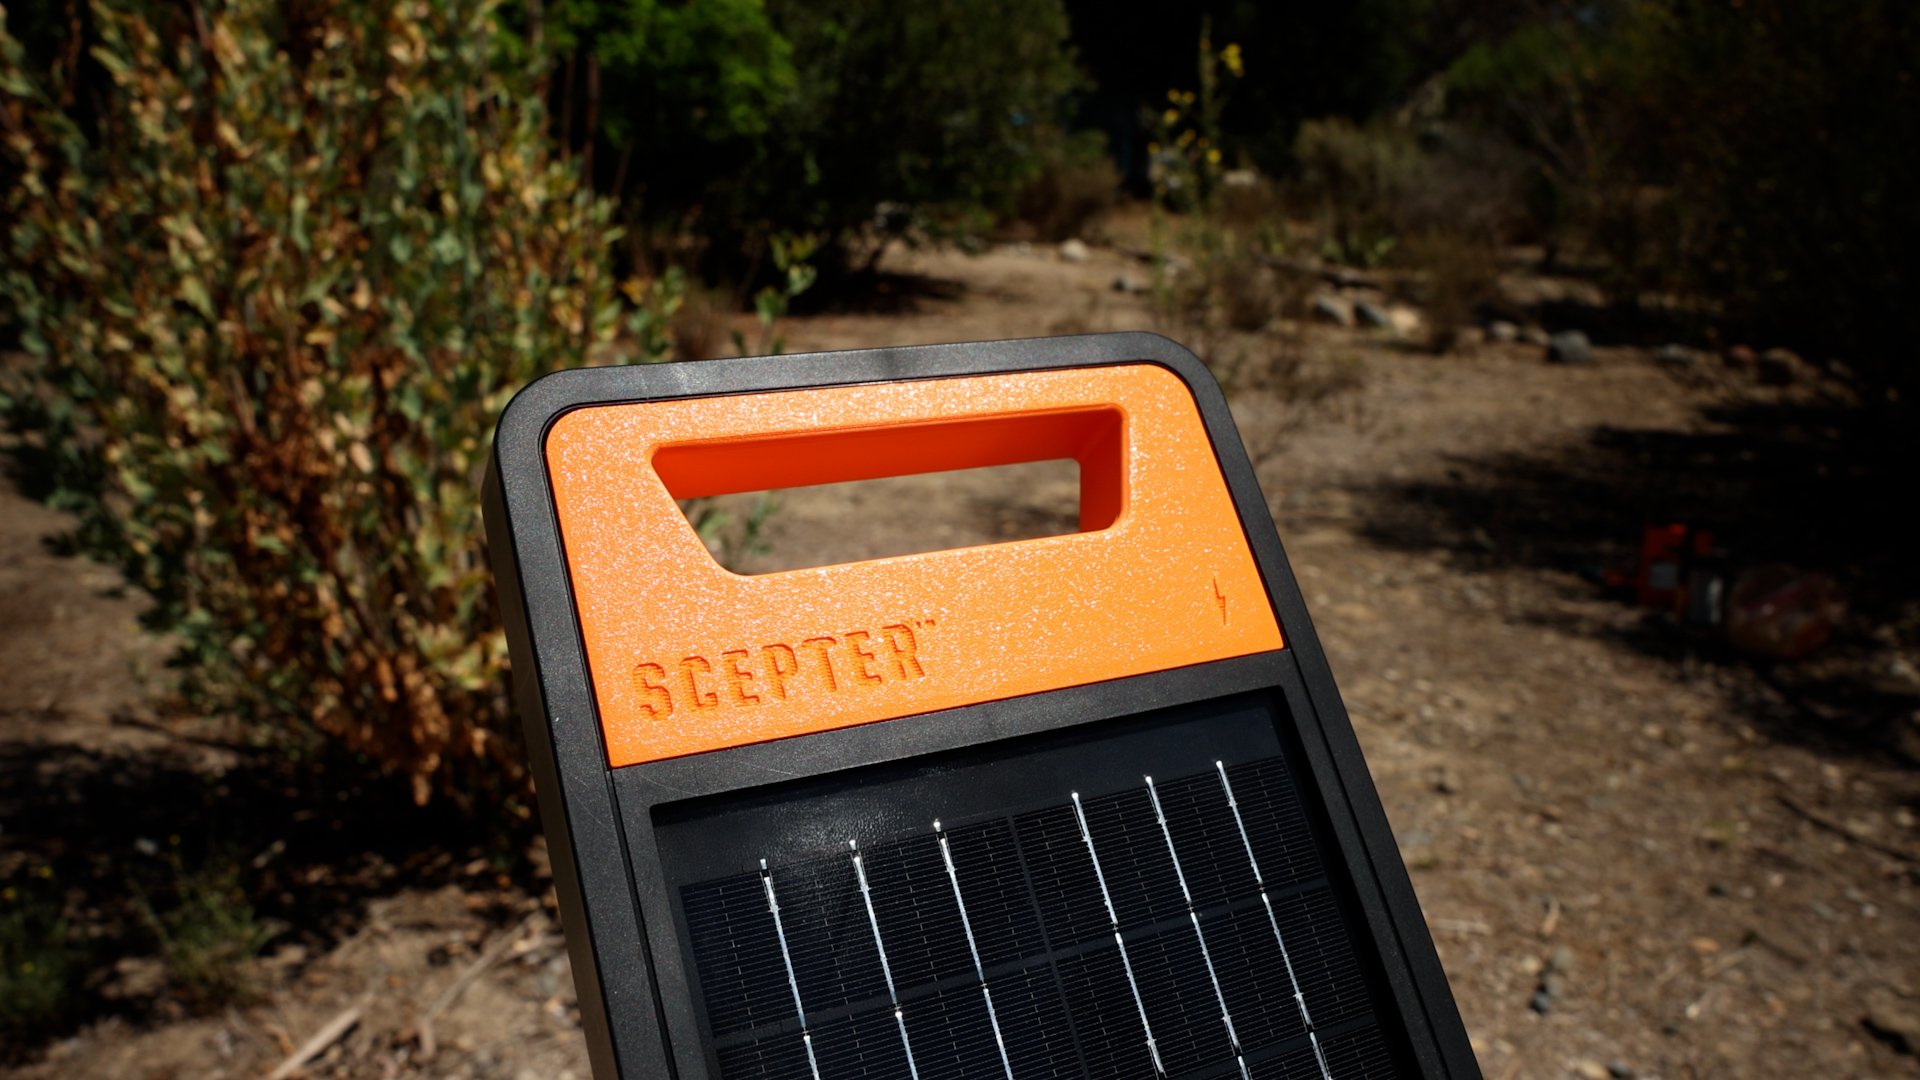
Begin with the Scepter solar charger mount, attaching it to the top of a Scepter Electric Post at the end of your fence line.
Step 1b

Place the Solar Charger unit on top of the mount and secure with a screw on the back of the unit.
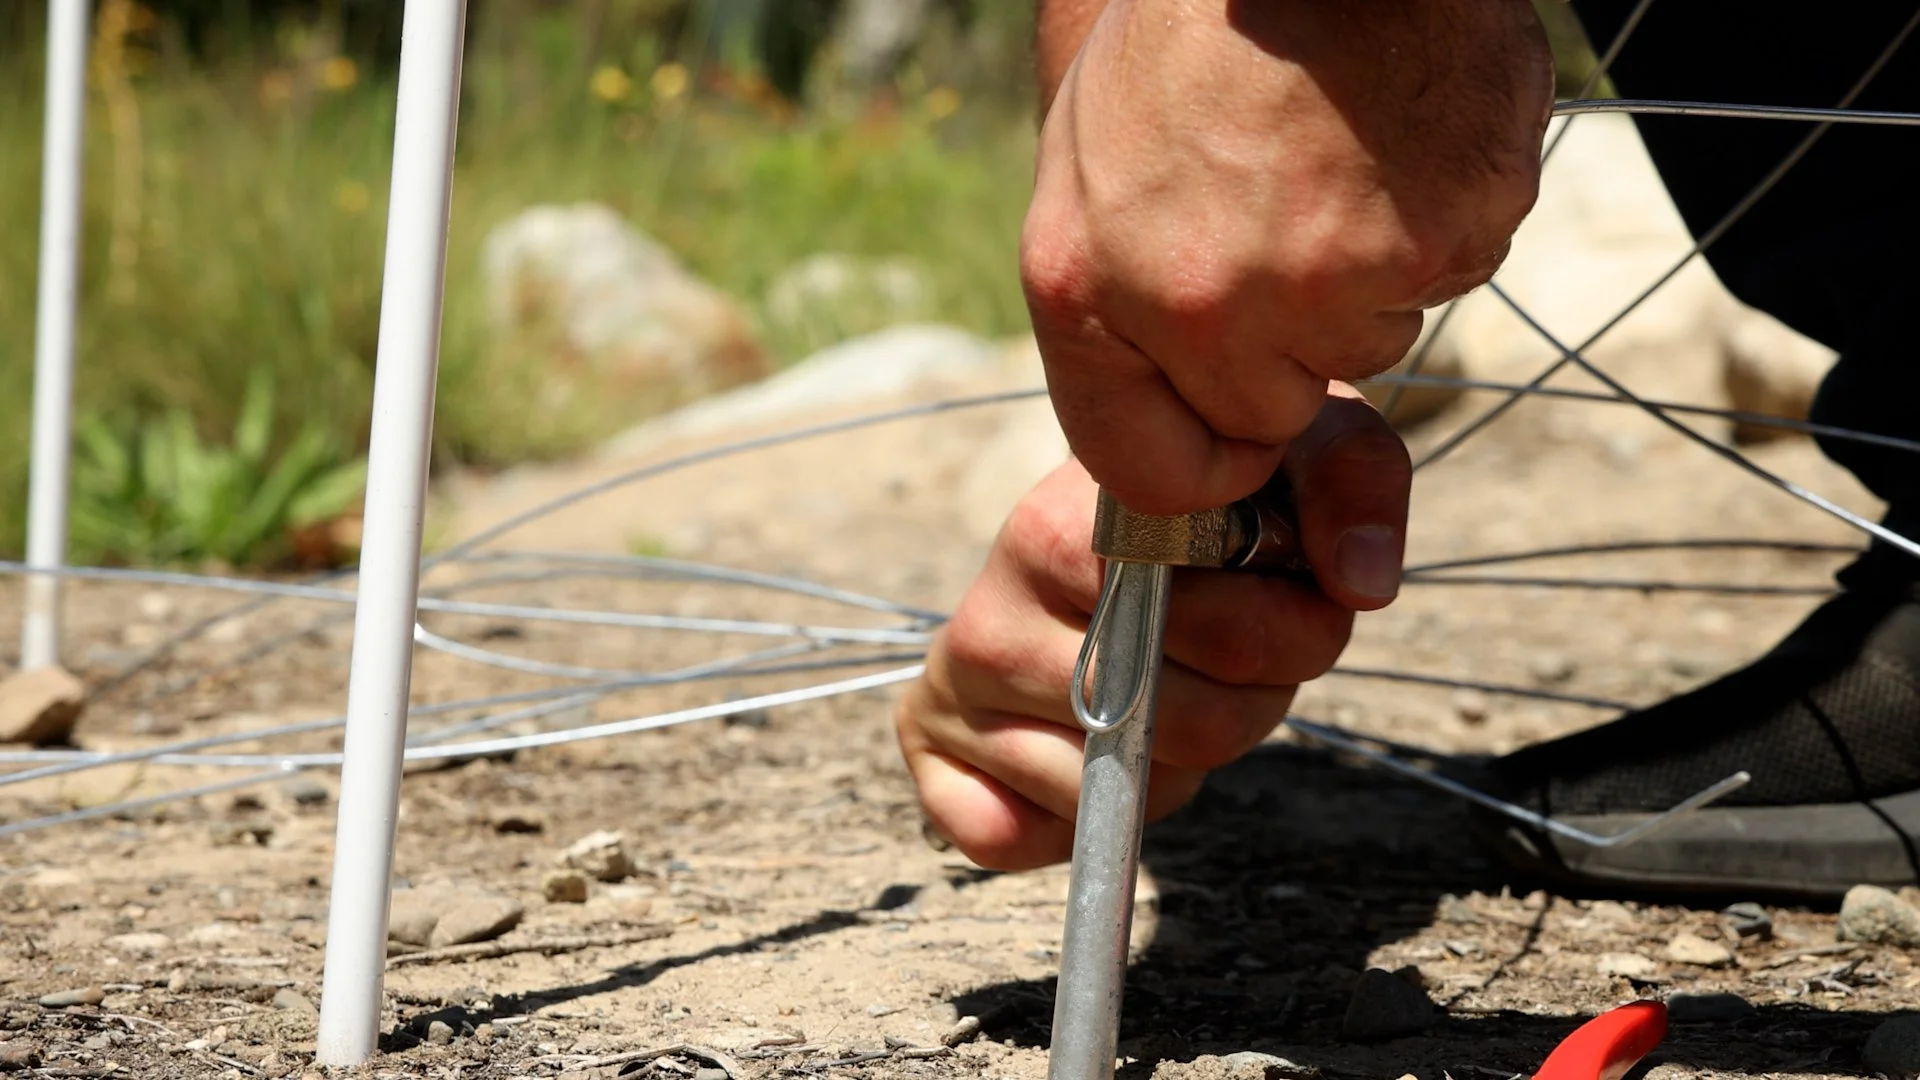
Step 2

Begin installing the 3 grounding rods with a club hammer or Scepter driving tool till there is approximately 6” exposed from ground. These posts should have a 10’ gap between the 1st and 2nd rod, then the 2nd and 3rd rod.
Step 3
Using the Grounding rod lugs, attach your grounding wire to all 3 of the grounding rods, securing in place.
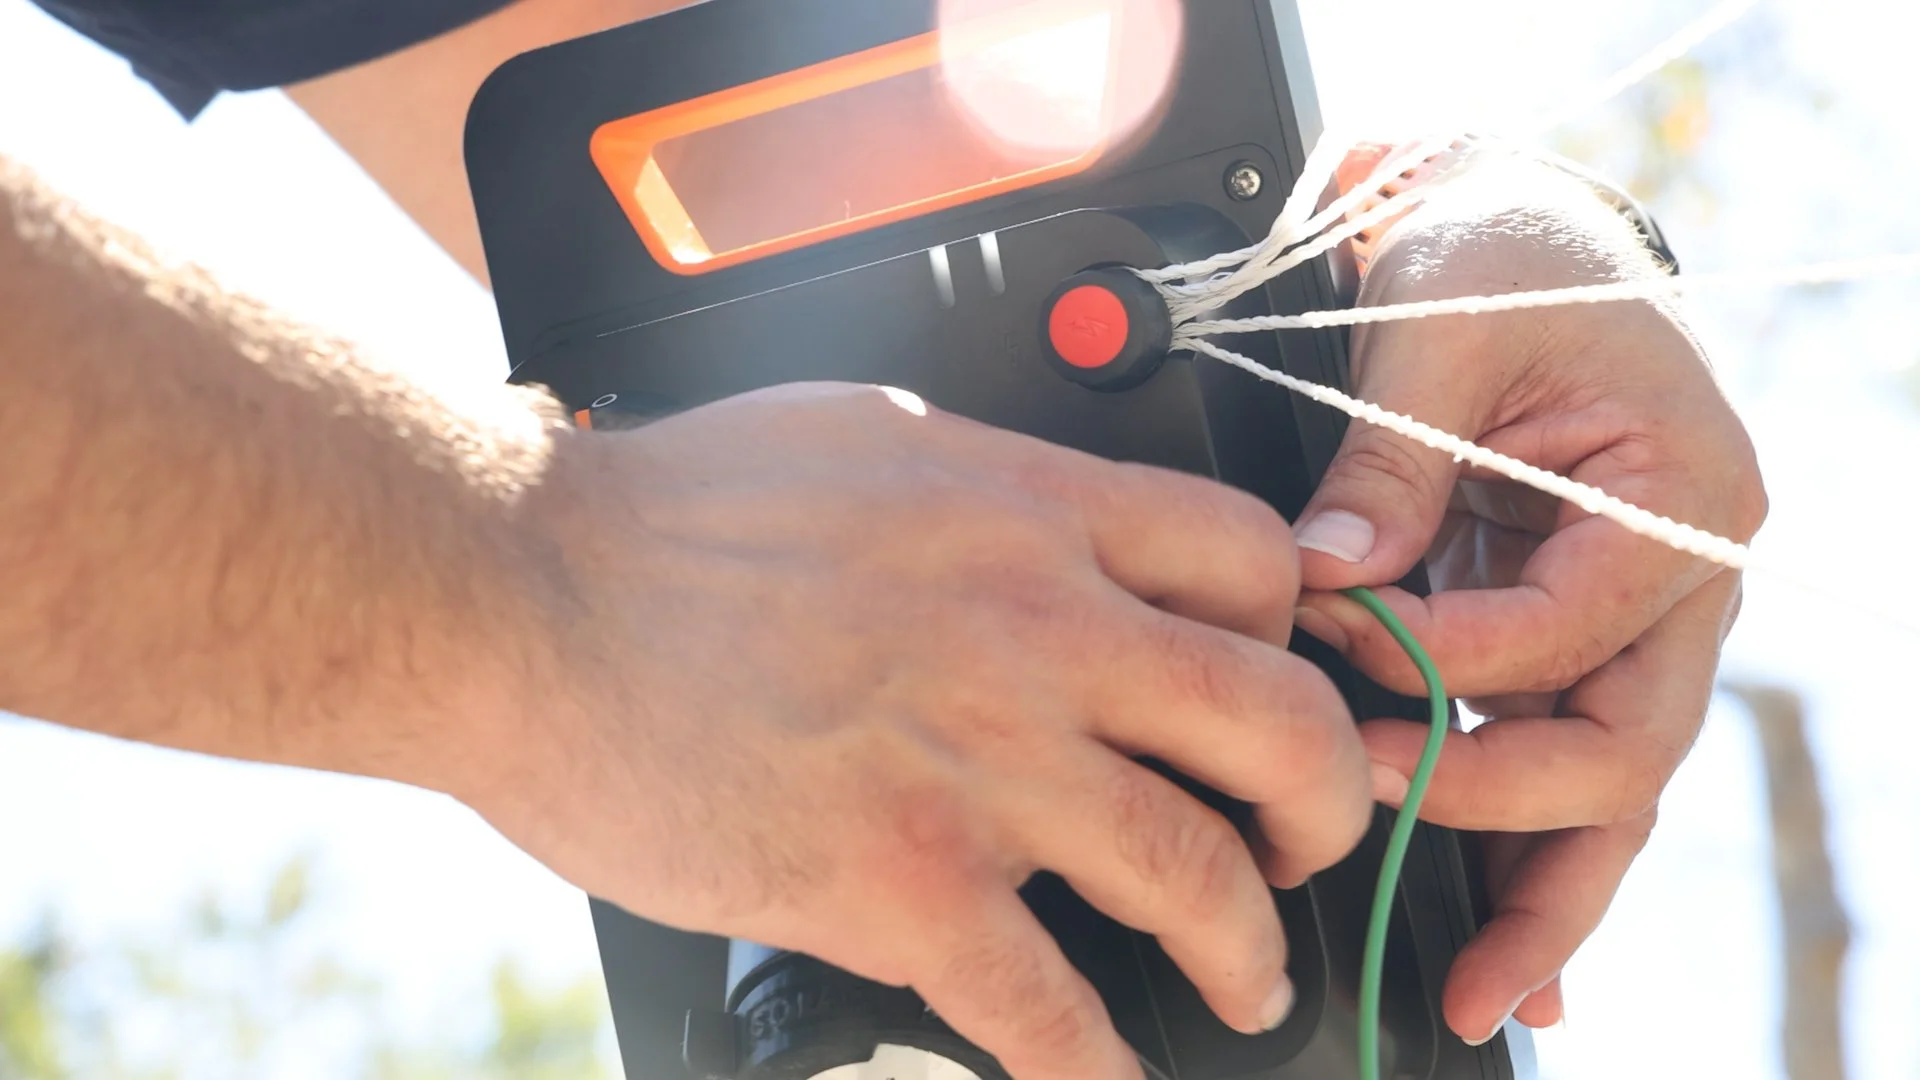
Step 4

Connect the poly wire to the positive terminal on the Scepter Solar Charger Unit.
Step 5

Connect the ground to the grounding rods and to the ground terminal on the Scepter Solar Unit.
Step 5b
Check List
Step 1

Ensure that all polywire is under tension and all E-clip pins are secure before turning on the Solar Charger Unit.
Step 2

Check all the grounding rods to ensure that they are properly connected and secured to the grounding wire.
Step 3
Make sure the Solar Charger unit is fully charged and operational before energizing the fence.
Step 4

Once Energized, test the fence with an electric fence specific Voltage fence tester to confirm proper output.
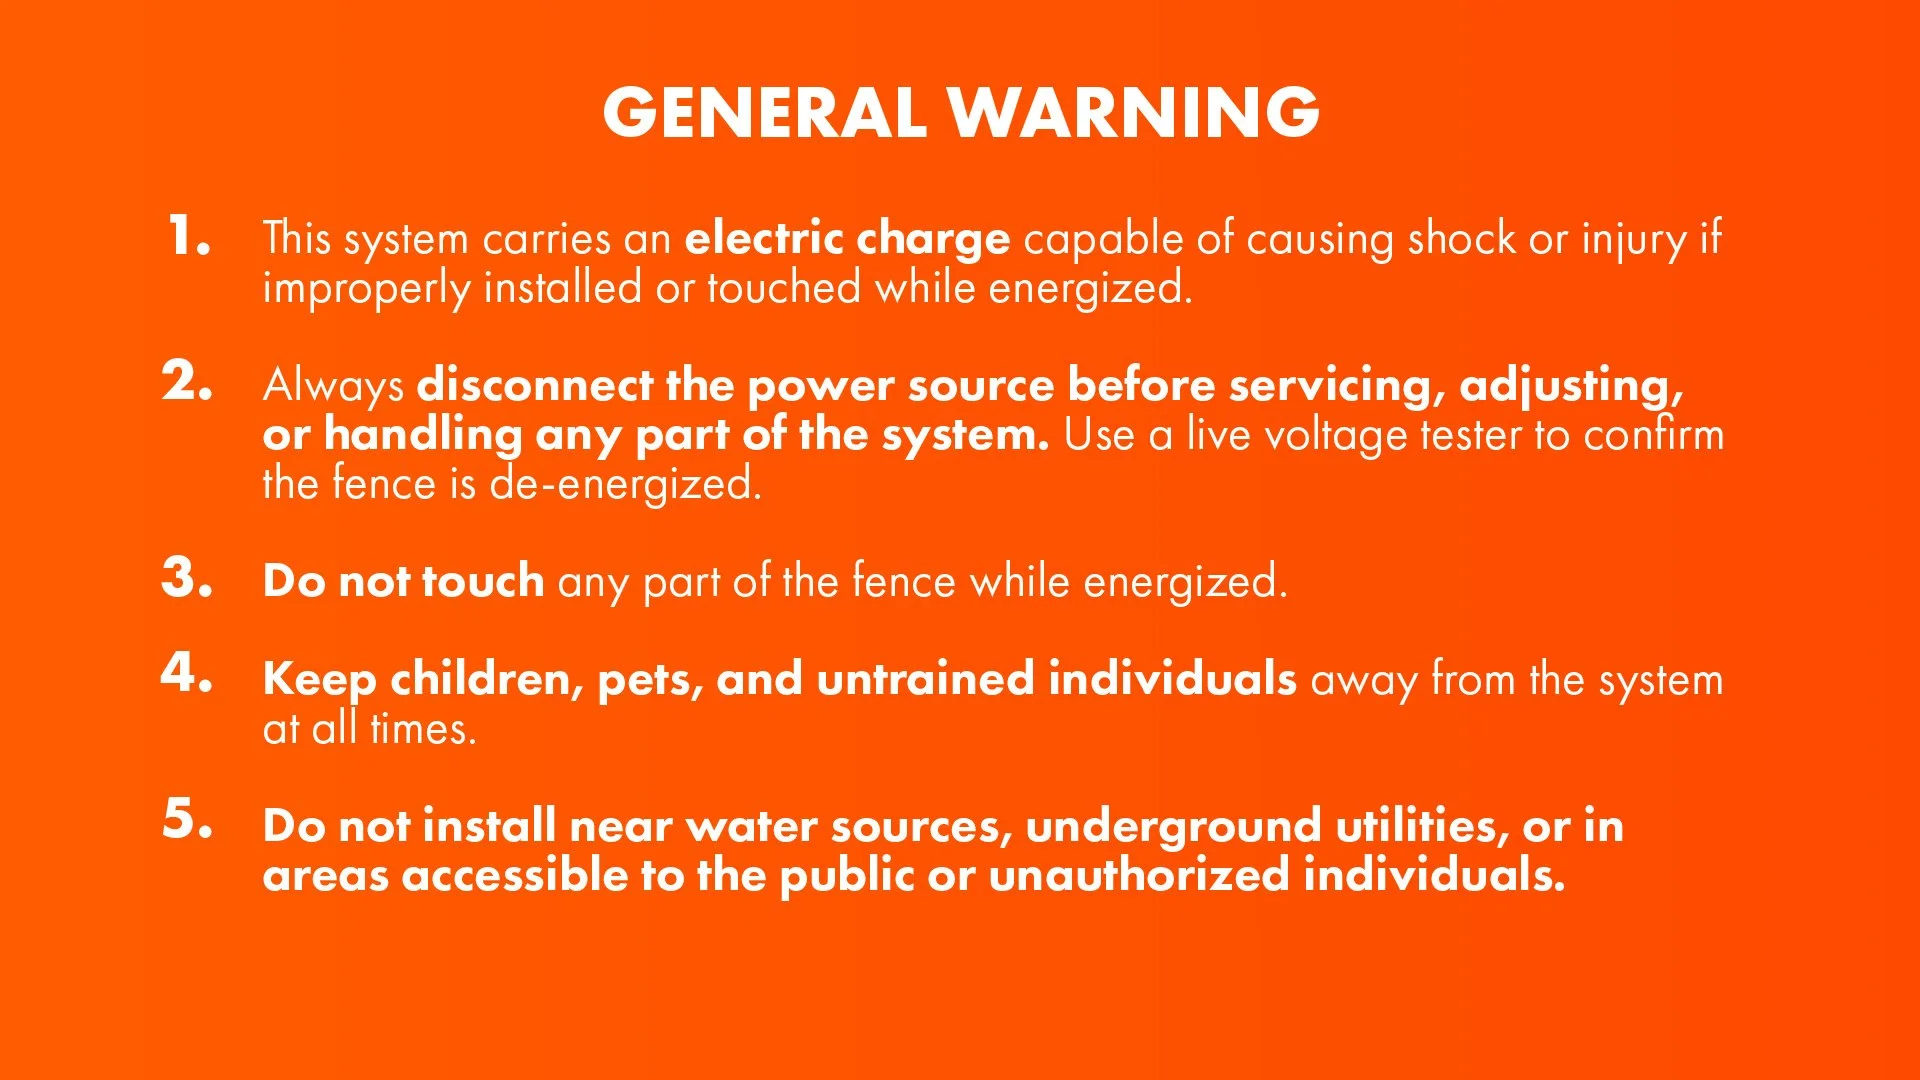
General Warning

Product Warning

Waiver of Liability